A Guide to Facebook Location Pages
Multilocation businesses have always struggled to represent their physical storefronts or service areas without cannibalizing their brand. Many resorted to managing multiple Facebook business pages, which led to brand consistency issues, a heavy workload and plenty of headaches.
Enter Facebook Locations.
We’ll show you how to create multiple business locations on your Facebook page and manage them in one spot, streamlining customer messages, posting, and analytics.
Facebook Location Page vs. Business Page
First, a quick look at the hierarchy of Facebook Business pages.
- A Business page represents the overarching “parent” entity.
- A Location page reflects the same brand, product, and services as the Business page but with localized contact information, hours of operation and, in most cases, content.
Business and location pages are accessed by individuals with personal accounts who have been granted varying permission levels to view or edit content within those properties.
How to Create a Location on Facebook
Creating a Facebook Business page with multiple locations takes just a few minutes! Make sure you have location-specific information handy, then dive in.
1. Convert Your Main Facebook Business Page
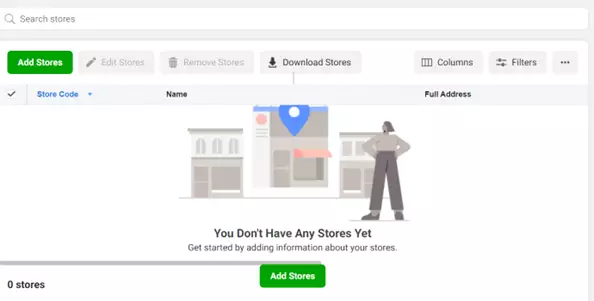
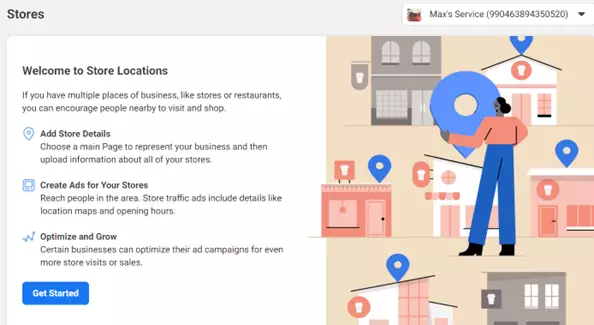
First, start with your primary Facebook page – this might be your original location, headquarters, or the storefront with the most visibility. Make sure you’re logged into the Meta Business Suite and head to the Stores tab.

Next, you’ll be asked to remove the address from your page – that’s okay. This will convert your page into the parent page, and Facebook will prompt you to make this address your first location page automatically!
2. Add More Facebook Store Locations
Navigate to the “Stores” tab and start adding all your locations! You can add multiple locations on your Facebook Business page by hand or using a Facebook address template. The template requires basic information, such as:
- Store number – A unique number to identify the location. If you don’t have existing store numbers, you can just put 1, 2, 3, etc.
- Location Descriptor – The name of the store. In most cases, this is how your organization refers to the store, whether by its official name (Hot Air Guitar Lessons of Akron) or street name (Hot Air Guitar Lessons Front Street).
- Street address
- City
- Zip code
- Phone number

3. Customize Each Location
You can select individual locations from the Business Location dashboard and see how they are displayed. The dashboard will look almost identical to your primary Facebook page but should show the correct contact information for that unique location. In some cases, Meta gets this wrong, so it’s worth double-checking that store hours, phone numbers, and other information are accurate for each storefront.
It’s certainly worth differentiating each location visually, too. We recommend taking professional brand photos to use on the locations’ covers and in-store images to give customers an accurate depiction of what to expect when they stop in!
4. Adjust Content Sharing Settings
A Facebook business page with multiple locations can save a lot of time posting by adjusting content sharing. Head to “Location Page Settings” in the Location tab and decide how posts are shared across location pages and how each location page is displayed.
You can choose to:
- Always publish content across all location pages
- Only show on location pages that don’t have their own posts
- Never publish content across more than one location
You can also choose to show a Locations tab on your primary business page to all users, only mobile users, or not display the Locations tab at all. We typically recommend displaying the Locations tab all the time to educate customers about a location they may not be aware of.
That’s it; you now have multiple locations for your Facebook Business page!
Related: The Multilocation SEO Guide
How to Remove a Location from a Facebook Page
When a store closes, you can easily remove the location. Navigate to your Stores tab, select the store ID or descriptor you need to yank and choose unpublish or delete. Choosing unpublish keeps the location’s information, but it won’t be visible to the public or appear on your page’s Locations tab. This is a good way to go, just in case you want to refer to any information or posts associated with the page in the future.
Get the Most Out of Location Pages with Original Content
Adding multiple locations to a Facebook Business page is the first step in personalizing the customer experience. Keep the momentum going by treating each location page as a unique storefront with its own regular customers, target audience, and personality!
- Create engaging, unique posts for each location as often as possible.
- Use events to raise awareness of each location.
- Put each location’s staff and personality front and center to strengthen customer loyalty.
- Use Facebook Ads to drive conversions for individual locations.
- Post location-specific job openings.
If it sounds like a lot of work, get a little help! Our social media team can create an organization-wide guide to social media marketing, list Facebook best practices to follow, and create assets for your team to use.
Every Location Matters – Maximize Your Multilocation Advantage!
We’ve seen first-hand how impactful social media marketing can be for multilocation businesses. For over twenty-five years, Oneupweb has helped companies from every industry overcome marketing challenges. From representing multiple locations to creating a can’t-miss brand, our integrated teams can do it all—you just need to say, “Go.”
Get in touch or call (231) 922-9977 today to get the ball rolling!